Welcome to our comprehensive guide on “How to Customize Invoice Columns for Articles.” In this tutorial, we’ll walk you through tailoring your invoice’s article columns to meet your specific business needs, ensuring precise and professional invoicing.
STEP 1:
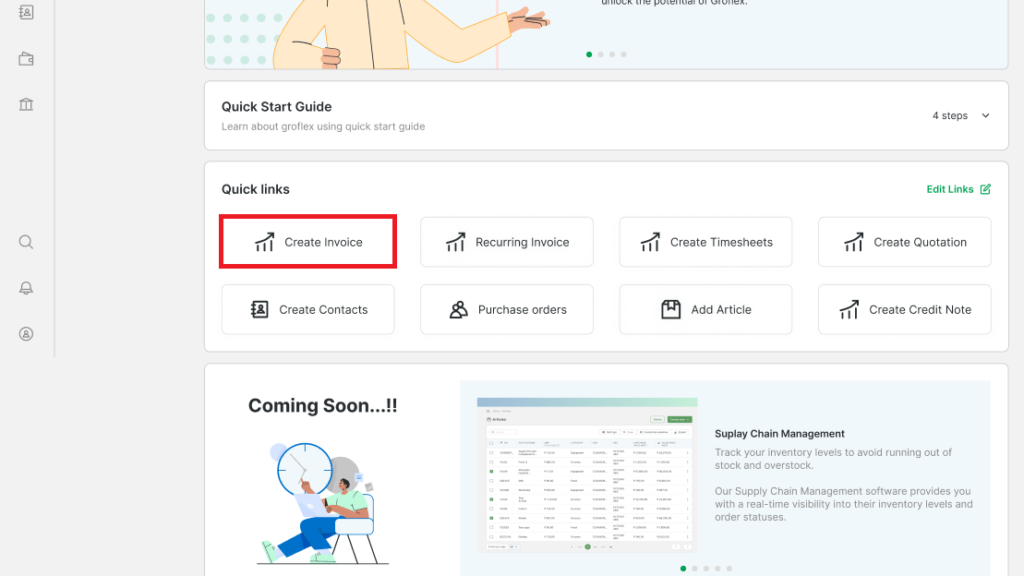
From the homepage under ‘Quick links’, click on ‘Create Invoice’.

STEP 2:
Hover over the column’s tab and click on the edit icon.

STEP 3:
To add a new column, click on ‘Add Custom Column’.

STEP 4:
Enter your new column’s name and click ‘Apply’.

FINAL STEPS:
Select the columns of your choice and then click ‘Apply’. Note: Only 9 columns are allowed in invoice.

To delete a column, hover over the column you want to delete and then click on the delete icon.

CONCLUSION
Congratulations! You’ve successfully learned how to customize the invoice columns for articles using our step-by-step guide. Now, you can create invoices that present your articles exactly as you need them, enhancing your invoicing efficiency.
Here, you will find all the related tutorials.


